Metallographic Sample Cutting Parameters: RPM, Feed Force, and Coolant Control for Consistent Specimen Quality
2026-02-19
Technical knowledge
This article provides a practical, standards-oriented guide to metallographic specimen preparation with a focus on optimizing the cutting stage for repeatable microstructural results. It walks through the full workflow—sampling, fixturing, cutting, cleaning, grinding, and polishing—then explains how core cutting parameters such as wheel speed (RPM), feed force, and coolant flow/filtration influence heat generation, deformation, burr formation, and subsequent grinding time. Typical defect patterns (e.g., burn marks, edge chipping, pull-out, and deformation layers) are mapped to their root causes and corrective actions, supported by parameter-setting logic, checklists, and common failure-case analysis. The guide also highlights the value of high-precision metallographic cutting systems—stable spindle speed, controlled feed, rigid clamping, and efficient cooling—to help export-facing laboratories improve preparation efficiency, consistency, and inspection reliability while aligning with widely used practices in metallography standards (e.g., ASTM E3 and ISO 9042).

Metallographic Sample Cutting Parameters Explained: A Practical Guide to Faster, More Consistent Specimen Preparation
In metallography, cutting is the first “quality gate.” If the specimen is overheated, deformed, or contaminated during sectioning, polishing cannot fully “repair” the microstructure. This guide breaks down the key cutting parameters—blade speed, feed force, and cooling efficiency—then connects them to real lab outcomes: lower rework rates, better repeatability, and cleaner microstructural images for customer reports and certifications.
Keywords: metallographic sample cutting
cutting parameters
metallographic preparation workflow
high-precision metallographic cutter
Why Cutting Parameters Matter More Than Most Labs Expect
In B2B testing environments—supplier audits, incoming inspection, failure analysis, or PPAP support—buyers care about one thing: trustworthy microstructure. Cutting parameters directly affect the near-surface zone that will later be examined under the microscope. When sectioning is unstable, labs typically see:
- Thermal damage (tempering colors, altered phases, local hardness change)
- Mechanical deformation (smearing, dragged inclusions, distorted grain boundaries)
- Edge chipping (especially on sintered, coated, or brittle materials)
- Inconsistent flatness leading to longer grinding/polishing time
As a rule of thumb, labs that standardize sectioning settings often reduce preparation rework by 15–30% and shorten total specimen preparation time by 10–20%, mainly by avoiding “hidden” damage that shows up only after polishing.
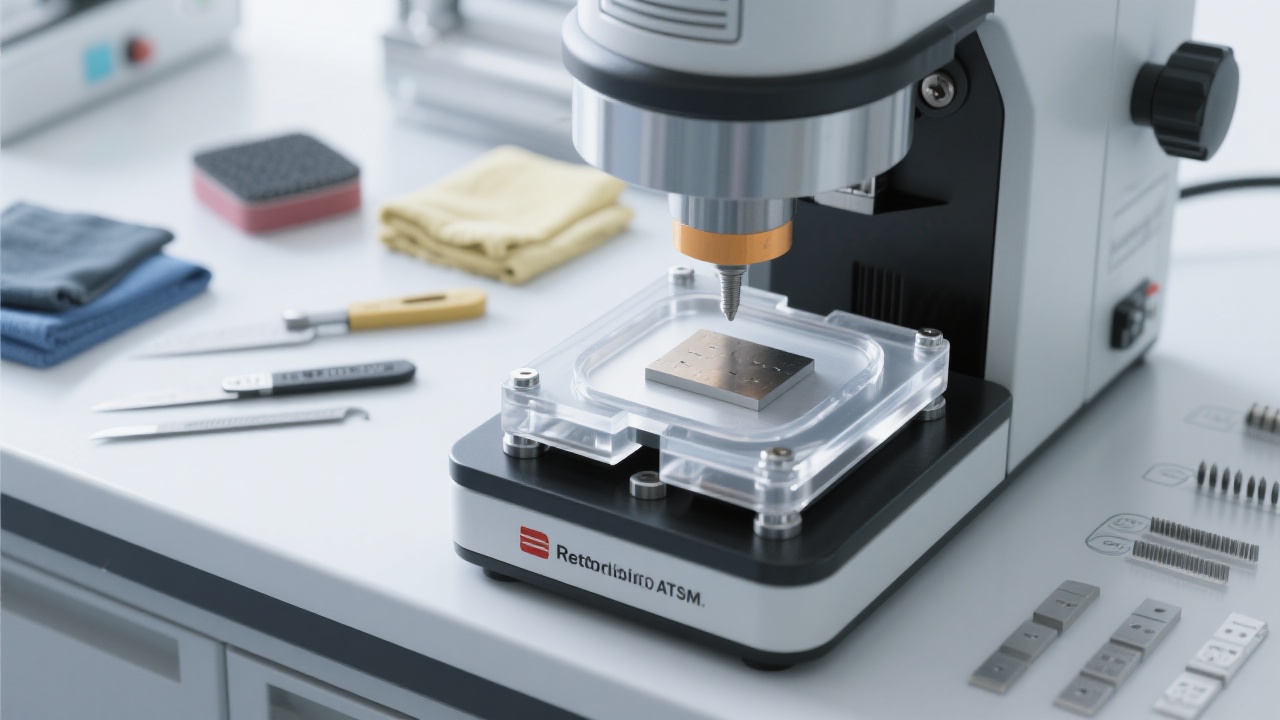
End-to-End Metallographic Sample Preparation Workflow (With Control Points)
Cutting should be designed as part of a controlled workflow, not an isolated step. Below is a streamlined, production-friendly sequence that fits most quality labs.
| Step |
Goal |
Key Control Point |
| Sampling / Orientation |
Capture the correct zone (weld, HAZ, surface layer, core) |
Mark orientation, avoid heat-affected areas during extraction |
| Mounting / Fixturing |
Stability and edge retention |
Clamp rigidity, minimal vibration, correct exposure height |
| Cutting / Sectioning |
Produce a flat surface with minimal damage |
Blade selection + RPM + feed + cooling + spark/temperature control |
| Cleaning / Drying |
Remove abrasive particles, oils, salts |
Rinse, ultrasonic if needed, avoid corrosion flash |
| Grinding |
Remove saw marks efficiently |
Grit sequence, pressure consistency, rotate direction |
| Polishing + Etching |
Reveal true microstructure |
Cloth selection, slurry, time, etchant concentration/time control |
Commonly referenced practices include ASTM E3 (preparation of metallographic specimens) and ASTM E407 (microetching of metals and alloys). Many international buyer audits also expect traceable SOPs aligned with ISO/IEC 17025 documentation habits (even when a lab is not formally accredited).
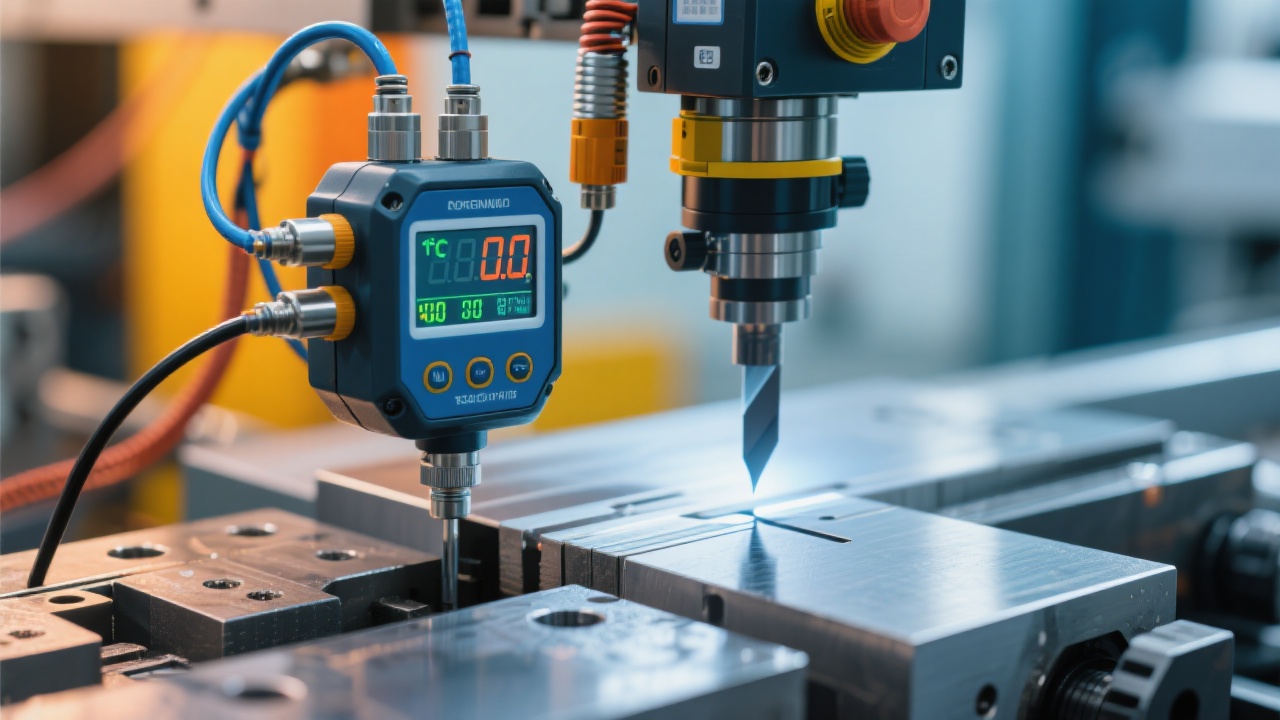
Core Cutting Parameters: What to Set, What to Watch, What to Record
A strong SOP doesn’t just say “cut slowly.” It defines inputs (RPM, feed, coolant) and outputs (surface condition, temperature indicators, time per cut). Below are the parameters that most directly drive metallographic quality.
1) Blade / Wheel Selection (The Fastest Quality Lever)
The blade type should match hardness, brittleness, and conductivity. For example, resin-bonded abrasive wheels are often used for steels, while diamond blades are preferred for hard/brittle materials (carbides, ceramics, thermal spray coatings).
| Material |
Recommended Blade Direction |
Typical Risk If Mis-matched |
| Low/Medium carbon steel |
Abrasive wheel, moderate hardness |
Excess heat, burrs, deep saw marks |
| Hardened tool steel |
Harder abrasive or diamond, strong cooling |
Burning, microcracks at edge |
| Aluminum alloys |
Fine abrasive/diamond, prevent loading |
Smearing, clogged wheel, drag lines |
| Carbides / ceramics / coatings |
Diamond blade, low feed, excellent cooling |
Chipping, delamination, missing edge |
2) Spindle Speed (RPM): Balance Heat vs. Cut Stability
Higher RPM can improve cutting action, but it also increases frictional heating when feed or cooling is not optimized. For many lab cutters, a practical working window is 1,800–3,200 RPM for general metals (depending on wheel diameter and blade type), while delicate or brittle samples often benefit from lower RPM combined with gentle feed.
Operator cue: If the cut shows discoloration, heavy sparking, or a “sticky” sound, the process is usually generating excessive heat. The first correction is often to reduce feed force and increase coolant flow before changing RPM.
3) Feed Force / Feed Rate: The Parameter That Separates “Fast” From “Rushed”
Feed that is too aggressive creates plastic deformation and pulls inclusions across the surface; feed that is too light can cause rubbing (heat) and longer cycle time. In standardized labs, feed is often controlled by constant-force or closed-loop feed systems rather than operator feel, because it improves repeatability across shifts.
| Symptom |
Likely Cause |
Best First Fix |
| Curved cut / poor flatness |
Vibration, loose clamping, high feed |
Re-clamp + reduce feed + verify wheel wear |
| Burn marks / blue tint on steels |
Heat buildup (feed too high, poor coolant) |
Increase cooling + step down feed |
| Edge chipping |
Brittle material, high feed, wrong blade |
Switch to diamond + lower feed + support edge |
| Heavy burrs on ductile alloys |
Blade loading or too coarse wheel |
Dress/replace blade + adjust coolant + consider finer abrasive |
4) Cooling Efficiency: Flow, Direction, Filtration, and Temperature
Cooling is not only about “more liquid.” Effective cooling requires the jet to reach the cut interface and remove swarf. Many labs see immediate improvements when they move from basic splash cooling to a directed nozzle that maintains a consistent stream on the contact zone.
- Flow rate (reference): for common benchtop cutters, 3–8 L/min is frequently workable; larger chambers may run 8–15 L/min depending on wheel size and material.
- Coolant temperature (reference): many labs target 18–25°C to avoid viscosity swings and corrosion variability.
- Filtration: fine particles can recirculate and scratch surfaces; a practical filtration range is 25–100 μm depending on the material and pump tolerance.
When coolant is underperforming, operators often overcompensate with lower RPM and slower feed, which increases cycle time and still may not prevent heat tinting. Fixing coolant delivery is usually the most cost-effective correction.
Standardized Cutting SOP: A Field-Ready Checklist
High-performing export-oriented labs treat metallographic sample cutting like a repeatable process: settings, records, and acceptance criteria. The checklist below can be printed and attached to the cutter.
Before Cutting
- Confirm specimen ID, orientation marks, and target zone (surface/core/HAZ).
- Verify blade type and condition (no glazing, cracks, excessive wear).
- Check clamp rigidity and minimize overhang to reduce vibration.
- Confirm coolant level, nozzle alignment, and filtration status.
During Cutting
- Start coolant before blade engages the sample; maintain a stable stream at the interface.
- Use controlled feed; avoid sudden force spikes (common cause of chipping and bending).
- Watch for abnormal sparking, smell, or discoloration signals; adjust feed/cooling first.
- Record the cut time and any anomalies for traceability.
After Cutting
- Rinse immediately to remove abrasive particles; consider ultrasonic cleaning for porous materials.
- Dry thoroughly to prevent corrosion flash (especially on steels).
- Quick visual acceptance: no burn tint, minimal burr, no edge breakout, flatness within lab tolerance.
For customer-facing reporting, many labs also document: blade model, wheel diameter, RPM, feed mode, coolant type, and filtration interval—small details that raise confidence during technical review calls.

Typical Mistakes That Quietly Destroy Microstructure (And How Labs Fix Them)
Mistake A: “Faster Feed = Higher Throughput”
In practice, aggressive feed often increases throughput only on the first day. Over a week, it raises rework: deeper grinding, more polishing time, and higher discard rates due to edge damage. Labs that switch to controlled feed commonly see a measurable improvement in consistency; a realistic target is keeping rework below 5% for routine materials.
Mistake B: Cooling That “Looks Fine” But Misses the Cut Zone
A wide splash can leave the actual interface dry, especially when guarding or fixturing blocks the stream. Labs fix this by aligning nozzles, increasing pressure at the nozzle (not just pump flow), and keeping coolant clean enough to prevent recirculated grit from acting like a second abrasive step.
Mistake C: Underestimating Vibration and Clamping
Vibration creates waviness, micro-chipping, and “mystery scratches” that keep reappearing during polishing. The fix is rarely exotic: shorten overhang, use a rigid vice, add support for thin sections, and ensure the sample does not rotate under load.
Where a High-Precision Metallographic Cutter Makes the Biggest Difference
Many labs can “get a cut.” Fewer can produce the same cut quality on Monday morning and Friday night, across different operators and sample types. A high-precision metallographic cutting machine typically improves outcomes when it provides:
- Stable spindle + low vibration design for flatness and repeatable section geometry
- Controlled feed modes (constant-force or programmable) to prevent deformation
- Optimized coolant delivery (directed nozzles, better circulation and filtration)
- Better chamber ergonomics for safe clamping and consistent positioning
In export-facing workflows, these features matter because they reduce operator-to-operator variability—one of the most common reasons buyers question metallographic results during technical audits.
Build a Repeatable Cutting Standard—Starting With the Right High-Precision Metallographic Cutter
If your lab is scaling sample throughput, preparing coated or brittle materials, or aiming for more consistent microstructure evidence in customer reports, it’s time to upgrade sectioning from “operator skill” to “controlled process.”


